Easily Migrate WordPress to a New Domain
Are you considering easily migrate WordPress site to a different domain? It’s essential to proceed with caution as altering your website’s domain name can have a significant impact on your SEO rankings.
Although there may be some temporary fluctuations in your SEO when easily migrate WordPress to a new domain, you can minimize the impact and restore your search traffic and rankings promptly.
This guide will demonstrate the correct method for easily migrate WordPress to a new domain without sacrificing your SEO.
Easily migrate WordPress site to a new domain name may seem daunting, but it doesn’t have to be. We’re here to guide you through each step of the process. You can access any of the links below to navigate to a specific step of migrating your WordPress site to a new domain name:
Table of Contents
There are a few things you should be aware of before getting started. When you easily migrate WordPress to a new domain, your search engine rankings will be temporarily affected as Google and other search engines adapt to the changes. Your search traffic will also be affected during this time. However, please understand that this is a normal occurrence that happens to all websites that easily migrate WordPress to a new domain. By following this guide, you can significantly reduce the SEO impact. We will guide you through the correct process of migrating your WordPress site to a new domain name, creating appropriate 301 redirects, and notifying search engines.
Please note that this guide only covers switching a domain name and not easily migrate WordPress site to a new host. While the process is similar, there are some additional steps you should take to safeguard your SEO rankings and traffic.
Finally, if your previous website is hosted on WordPress.com, you should consult our guide on how to move from WordPress.com to WordPress.org instead.
This guide assumes that you have your WordPress website set up on oldsite.com and are looking to easily migrate WordPress it to newsite.com. We also assume that you already have a WordPress hosting account and are familiar with your web hosting control panel. Additionally, you should be proficient in using an FTP client like FileZilla or editing files using the File Manager app accessible under your hosting account dashboard.
If you don’t have a web hosting provider or are considering switching to a new one, we recommend using Bluehost, which is excellent for small sites and comes with a free domain. For larger sites or online stores, we suggest either SiteGround or WP Engine.
Once you have all these prerequisites, you’re ready to start the process!
The first step is to create a complete backup of your WordPress site. We’ll use this backup to duplicate your website so you can set up redirects correctly from the old domain to the new one. Although numerous WordPress backup plugins are available, we’ll be using Duplicator, a free backup and migration plugin.
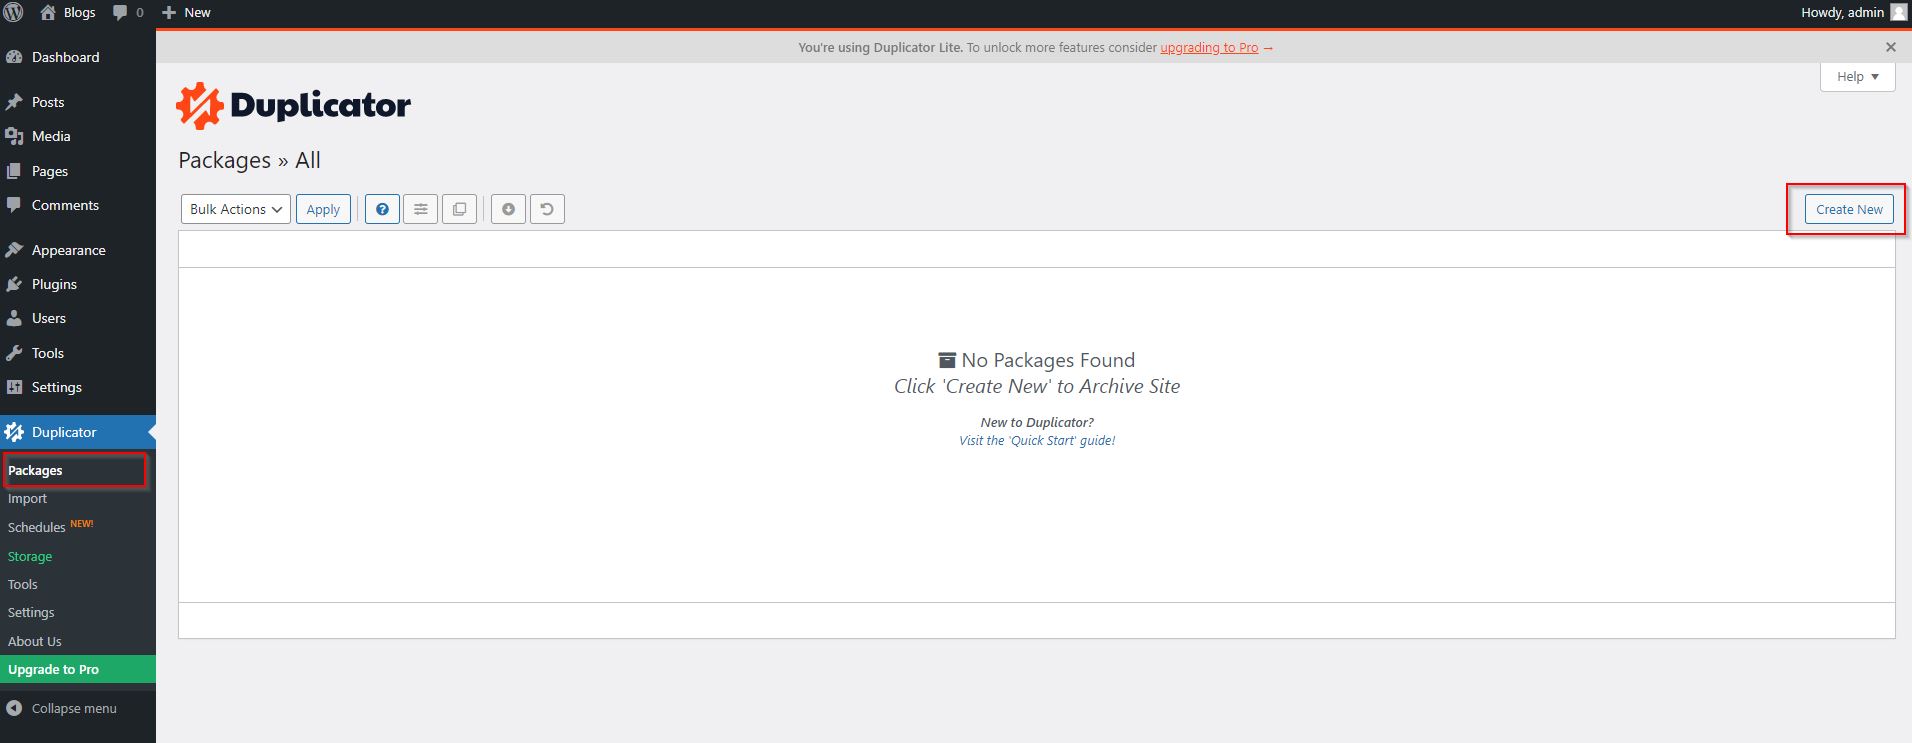
To begin, install and activate the Duplicator plugin on your old domain name. For further instructions, please refer to our step-by-step guide on how to install a WordPress plugin. Once activated, the plugin will add a Duplicator menu item in your WordPress admin. Click on the Duplicator menu, followed by the ‘Create New’ button to generate a new package or copy of your WordPress site.
Next, you will be asked to click on the Next button.
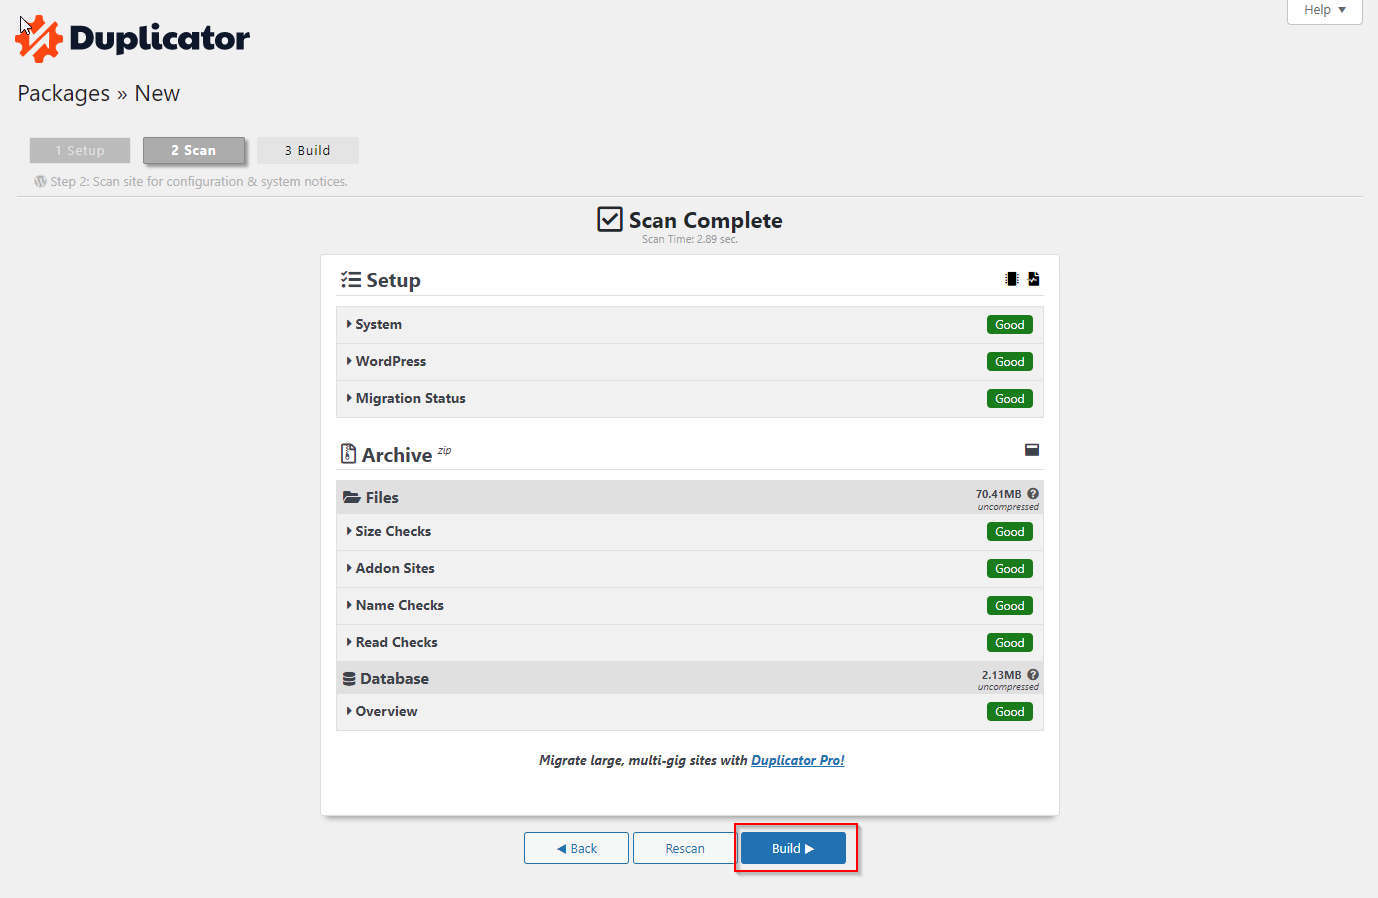
The website duplicator wizard will now be run by Duplicator. It will first run some tests to make sure everything is in order. In the event that the plugin detects an issue, you will be notified and given instructions.
Click on the ‘Build’ button if all items are marked ‘Good’.
The plugin will begin creating a duplicator package of your website files. The duration of this process is contingent on the size of your site and may take several minutes. Upon completion, you’ll notice download options for the Installer and the Archive package. To download both files to your computer, click on the ‘One-click Download’ link.
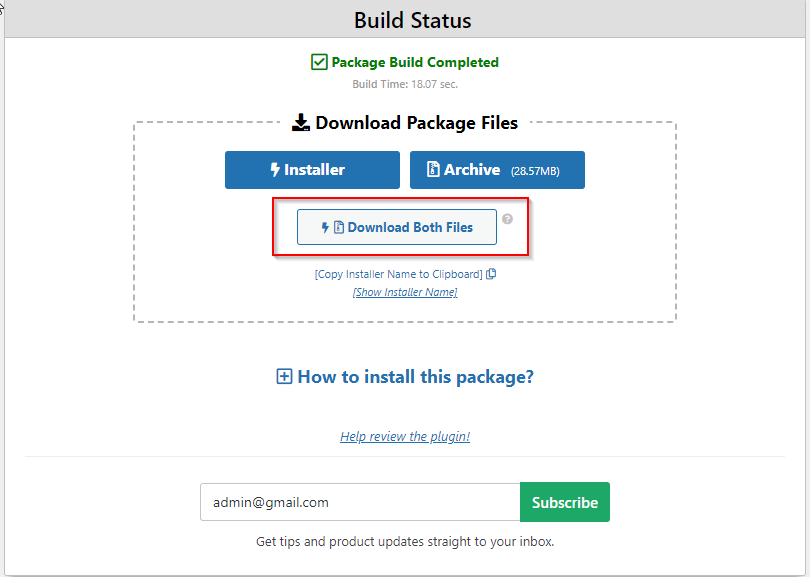
The archive file constitutes a comprehensive copy of your WordPress files, incorporating your WordPress themes, permalink settings, plugins, uploads, and any other files produced by WordPress plugins. The installer script, on the other hand, is a PHP file that will simplify and execute the WordPress migration by unpacking the archive file.
In order to easily migrate WordPress site to the new domain, you must have a new SQL database to unpack WordPress on the new domain name. If you have already established a database, you may skip this stage.
To create a database, navigate to your hosting account’s cPanel dashboard, locate the ‘Databases’ section, and select the ‘MySQL Databases’ icon.
Please note that the appearance of your hosting control panel might vary slightly from the screenshots provided in this guide. However, you should still be able to locate the Databases section and create a new database by following the instructions.
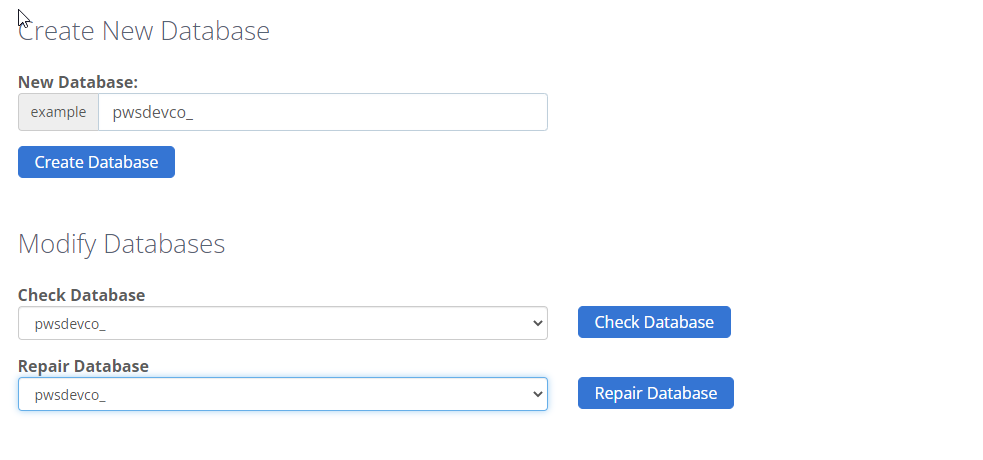
To create a new database, navigate to your hosting account’s cPanel dashboard, find the Databases section, and click on the ‘MySQL Databases’ icon. Provide a name for your new database and click on the ‘Create Database’ button. cPanel will then create the new database for you.
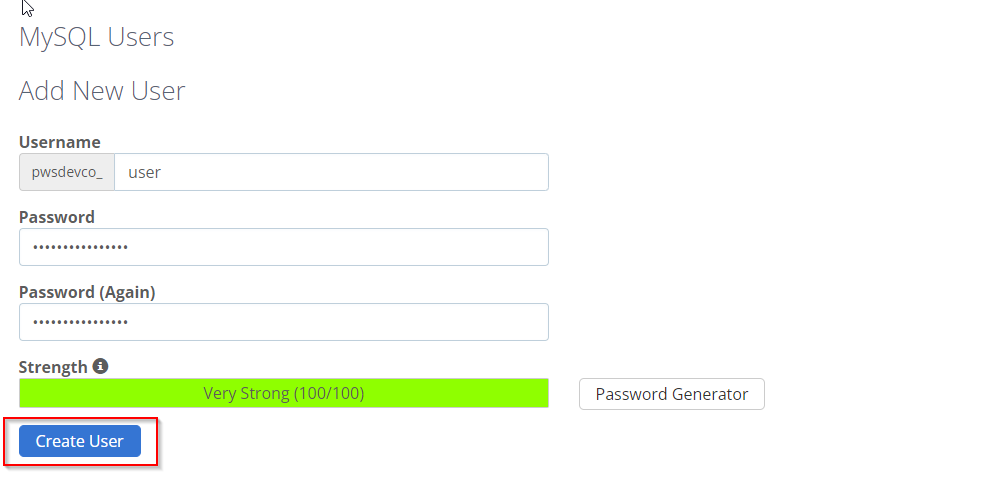
After creating the database, locate the MySQL Users section and provide a username and password for the new user. Click on the ‘Create User’ button and make sure to store the username and password in a secure place.
To grant permission to the new user you created, you need to navigate to the ‘Add User to Database’ section. From the dropdown menu next to the ‘User’ field, select the database user you created earlier. Next, select the new database you just created and click on the ‘Add’ button.

Now that you have created the necessary database for easily migrate WordPress site to the new domain, ensure to take note of the database name, username, and password. You will require this information for the next step.
To move forward with the easily migrate WordPress, you have to upload the Duplicator files downloaded earlier to your new domain. Along with this, the Duplicator package already includes your WordPress installation, and hence you do not have to install WordPress on the new domain.
Begin by connecting to your domain name using an FTP client. Once connected, ensure that the root directory of your website is empty. Then, you can proceed to upload the archive and installer files to the root directory, which is commonly referred to as public_html.
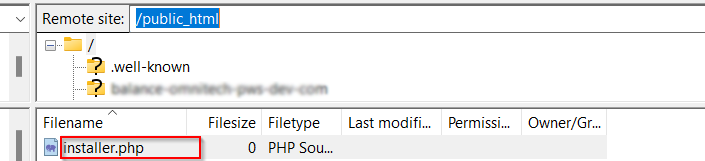
After both files have finished uploading, you are now ready to unpack WordPress.
Open a new browser tab and go to the following URL:
http://example.com/installer.php
Remember to replace “example.com” with your new domain name. This will launch the Duplicator migration wizard.
The installer will search for the archive file. Click on ‘Next’ after checking the terms checkbox.
Your WordPress database information will now be requested by the installer.
It is likely that your host will be localhost. You will then enter the database details you created for your new domain name earlier.
After completing the previous step, click on the checkbox and ‘Build’ button to proceed. Duplicator will then unpack your WordPress database backup from the archive into your new database.
To avoid SEO and user experience issues, it’s important to set up 301 redirects to point users arriving on your old domain name to the new one. These redirects automatically redirect users and search engines to the same post or page on your new domain, rather than seeing a 404 error.
To keep your redirects active, you should keep your old WordPress installation running. There are two ways to set up these redirects: one is easy and only requires a few clicks, while the other involves manual file editing.
Method 1. Set Up 301 Redirects With All in One SEO
To implement this method, we will use the All in One SEO (AIOSEO) plugin. This plugin is considered the best WordPress SEO plugin that allows you to optimize your WordPress website for SEO with ease.
To get started, you need to install and activate the All in One SEO plugin on your old domain. Check out our step-by-step guide on how to install a WordPress plugin for more details.
Note that you will require at least the Pro version of the plugin to access the redirect manager addon. You can also install AIOSEO on your new WordPress site to enhance your search engine rankings and traffic even further.
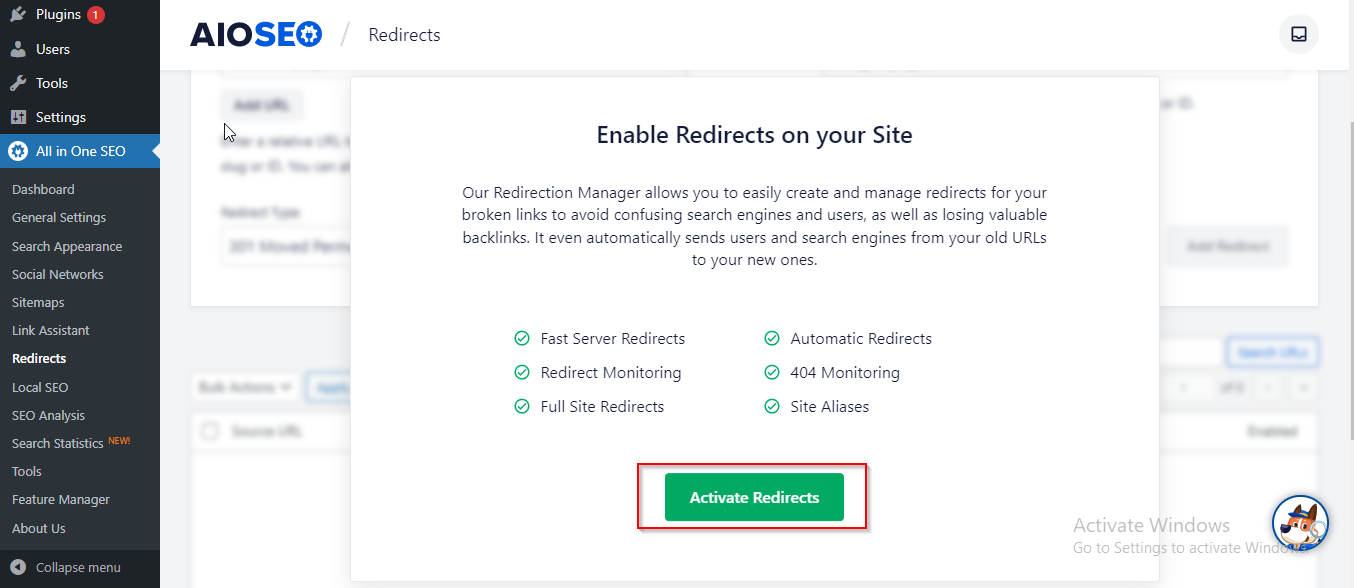
After activating the plugin on your old domain, navigate to All in One SEO » Redirects page and click on the ‘Activate Redirects’ button.
Method 2. Manually Set Up Redirects to New Domain
To implement this method, you will need to modify the WordPress .htaccess file on your old domain name. First, use FTP to connect to your old site and edit the .htaccess file located in the same directory as your wp-includes or wp-admin folder. Open the file and add the following code at the very top:
#Options +FollowSymLinks
RewriteEngine on
RewriteRule ^(.*)$ http://www.newsite.com/$1 [R=301,L]
Make sure to replace “newsite.com” with your new domain name in the above code. Once you have made these changes, visit your old domain name. It should automatically redirect you to the new domain. If not, it may indicate that the redirection is not set up correctly, and your server may not support redirect rules. Contact your web hosting company’s support team to have RewriteEngine enabled.
After successfully migrating your WordPress site to a new domain and setting up redirects, the next step is to inform Google about your change of address. This will allow Google to quickly find and display your new domain in search results.
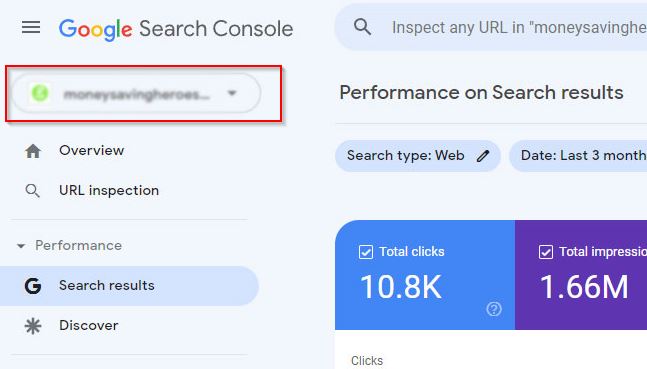
To start, you need to ensure that both your old and new domains are added to Google Search Console as separate properties. Refer to step 1 in our Google Search Console guide for detailed instructions.
Once both properties have been added, select the old domain as the active property in your Google Search Console account dashboard.
It is advisable to make a public announcement about your website migration despite the functionality of the 301 redirects. One way to achieve this is by writing a blog post on your new site and sharing it on your social media accounts.
Additionally, if you have email newsletter or push notification subscribers, you can notify them about the change as well. This approach has several benefits. Firstly, it helps to increase the chances of your users remembering the new domain name.
Secondly, you can request your users to report any bugs they come across, which can be useful in identifying and fixing any issues that may have been overlooked. We hope that this guide has been helpful in moving your WordPress site to a new domain name.
You might also be interested in our guide on how to obtain a free email domain or our expert recommendation for the best business phone services.